Friday, 15 April 2016

The keyhole Blouse

Hi Guys
Hope you have had a lovely week and got lots of sewing in. 

I started my attempt of the keyhole blouse pattern last weekend. It is the first real type of pattern I have tried and even though I have enjoyed it, I also realised how much I have to learn.

To be fair the pattern itself  has very simplified sizing guides, and the instructions are very clear with good pictures to guide you through.


I knew from experience of buying clothes and reading other sewing blogs, that I would need to do a full bust adjustment.  This is the one I used here .  I have to say it was much easier to do then I was expecting, even if the pattern piece looked totally butchered by the end of it. Only time will tell on how successful it has been.


Choosing the fabric took ages, as I knew I needed something that would drape well. But I'm finding a lot of the smaller shops in my area, seem to cater more for quilting, and don't really carry a large range of dress fabric. The best shop I found in the end was Fabric Magic in Trowbridge, where I selected a bright red Crepe, it was not too expensive either just encase it all goes terribly wrong.


I was a bit worried about working with this type of fabric, as I have heard it can be a bit more slippery, but I did not find it too bad.  It was all going very well until I got to putting in the sleeves.  To start with I was very chuffed with my first attempt, when checking the seam over it did not look too bad, and the gathers were not too un even. When to my horror I realised I had put it in the wrong way, so the wrong side of the fabric, would be on the outside. I had to get the seam ripper out, and take it all apart, and do it again. This time I caught parts of the sleeve in several places, and it looked really bad.  By this time I was a bit frazzled and left it in a bit of a huff. The next day I managed to unpick it again, and put in both sleeves successfully. yay me.

It is not quite finished yet, I still have the neck line to do and the hem, but this should not take too long.  I have tried it on and it is not a really good fit, but not bad for a first attempt.  I think as well as the bust adjustment, I might need to widen the back through the shoulders a bit as well. It is a bit snug when you shrug the shoulders forward, but will have to look into this a bit more, as I have no idea how you would do this.  I suppose the other option could be to make the next size up, and do a slightly smaller bust adjustment, and adjust the side seams.

Come back next week to see the finished garment, but here is a sneak peek of how it looks now.


Friday, 8 April 2016

My Sewing plans for the next 12 months

Hi Peeps. 
I live in England and spring is now in full swing, with colourful blooms popping up everywhere.  It is making me want to  sew lovely flowery dresses and blouses.  I have so many things I want to try and make, but I have to be practical I work full time and only get a few hours a week to squeeze in my sewing.  I'm one of those weird organised people who like to makes lists. you have got to love a good list right!  So I have decided to set myself a goal to make one item a month which for me I think is realistic. 

So I have pulled out my huge collection of patterns.  I can't believe how many I have managed to collect in just one year.  Most are aimed at beginners so I should be able to give it a good go.

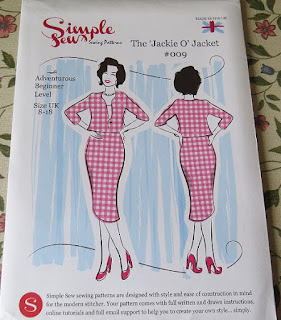
These are the patterns I have picked out.  Please let me know which one is your favourite, maybe you have already made one yourself any advice would be appreciated.


My next project is going to be the keyhole blouse as I really need a new one for work, so I'm hoping it will be good enough to wear.  I was going to make the long sleeved version but it is warming up over here so think I will do the 3/4 length plain front one.  I also know I will need to do a full bust adjustment,  I'm quite a busty girl which is one of the reasons I was inspired to make my clothes, I was so fed up of having to buy clothes bigger to fit over them, to find it is too big else where.
There are lots of videos on the internet which show you how to do it, but if anyone knows of a very good one let me know.

Wish me luck and come back soon to see how I get on.

Friday, 4 March 2016

No Pattern Circle Skirt

Before I forget Happy Mothers Day to all the Wonderful mothers out there, I don't know how you do it.

Now on to my next sewing project.  While flicking through some old sewing magazines I came across a full skirt you can make with no pattern. It looked really nice on the model in the picture, but it has turned into a bit of a disaster from start to finish.

The instructions in the magazine gives you a sum to do with your measurements so you know how much fabric you need to buy, maths has never been my strong point.  So off I went armed with my bit of paper to the fabric shop.  I spent ages looking round all the gorgeous fabrics, but decided to go with a cheaper navy blue polka dot cotton. I thought it best not to buy really expensive material at this stage, this was to be my only wise choice.  when I got to the counter the enthusiastic young girl asked me how much I wanted, looking at the sum I did before it said I needed 4 meters of fabric.  the girl did not bat an eyelid and started to measure it out.  Looming behind her I could see this stern lady looking at me very strangly and she eventually asked me what I was going to be making, I told her and she said are you sure you need 4 metres that seems an awful lot.  By this point I started to feel a bit flustered and not wanting to look like a complete idiot I said yes.  I grabbed my purchase and ran feeling a little embarrassed.  Once home I doubled checked my sums and low and behold I had messed up completely and realised 2 meters would of been more then enough. never mind.

I soldiered on and followed the instructions it is quite simple, you cut out two rectangles and sew up the side seams.  you then have to sew 3 lines of gathering stiches along the top again not to much of an issue here. but then I had to sew an elastic band to the top, this did not go well.  It kept bunching up and I'm not sure if you need to use a special needle as mine kept puching the elastic part though so I have lots of loops, it does look a bit of a mess.  The next lesson I learnt is always check how much you still have left on your bobbin before you start sewing a very long hem, as I ran out half way round and no matter how carful you are it is very hard to start again and make it look neat.


Finally it was finished, it did not look too bad. I was very excited and tried it on straight away.  It was not good, the cheap cotton just doesn't hang very nice and it is completely see through.   looking at my self in the mirror I should of known better really who was I kidding these types of skirts have never really suited me.  I don't think I will be wearing this any time soon.


If any of you have any ideas on how I could rescue this skirt then I'm open to trying. Seems a waste to just throw it away.  though I still have to find a use for the other 2 meters of this cotton I still have not used.

Hopefully I will have better luck next week.

Friday, 26 February 2016

My first project

I don't know about you but looking inside the envelope of a dress making pattern at the moment makes me want to run and hide.  They all look so complicated with wiggly lines and symbols.  I think I need something fun and easy for my first project.  After hours of searching the net for inspiration I think I have found the perfect item.  I like to think of myself as a domestic goddess in the kitchen (I'm not really) but we can always look the part right?  I decided the missing item in my wardrobe was a cute apron.

Now we get to my favourite part of the whole process shopping.  I looked around a number of sewing and fabric shops when I settled on a kit for the Berry Apron from Millie Moon.  It is a beginners dream, it comes in a sweet little box with everything you needed to make an apron, it even have swatches on the outside of the box so you can choose the one you like the best.                           


This kit was perfect for me, it came with a little instruction booklet which had clear and easy to follow instructions, there was a colour pictures to show you what each step should look like.


With every thing to hand, I cranked up the 80s music and got stuck in. In About 2 hours I had an apron to be proud of and it was wearable.